Into the Hive does not currently have a confirmed public list of named maps or a fixed map rotation. The reliable map reference is a set of randomly generated cave spaces: you explore, manage encounters, use destructible terrain to shape routes, complete the mission, and then make the return trip to Extraction. Treat each run as a route-planning problem rather than memorizing one permanent layout.
What the Into the Hive map contains
The following catalog describes the map elements you can plan around. It separates confirmed map functions from details that are not established, such as fixed room names or a guaranteed spawn pattern.
| Map element | What it does | How to use it |
|---|---|---|
| Randomly generated caves | Provides a different cave layout and route on an expedition | Read the current cave instead of expecting a memorized path |
| Destructible terrain | Lets the squad break through walls and open another route | Create an opening when it improves access, retreat space, or defense |
| Cave routes | Connect exploration areas, mission progress, and the return direction | Track where the objective and Extraction lie as you move |
| Enemy approach areas | Allow enemies to approach from the left, right, or middle during encounters | Turn your position and equipment toward the active threat direction |
| Mission objective areas | Provide the location or space needed to progress the current mission | Explore until the current objective is completed; exact objective types are not confirmed |
| Extraction route | Supports the return trip after the mission is complete | Keep a retreat route in mind and travel back without unnecessary fights |
These rows are map functions, not a list of six fixed stages or six named locations. The available information confirms sprawling, randomly generated caves and destructible terrain, but it does not confirm official map names, a fixed order, exact room layouts, or a universal set of objectives. A cave can therefore contain the same broad gameplay needs while presenting a different route each time.
Reading a randomly generated cave
Start by identifying the direction of useful progress, not by assuming that the first open tunnel is the correct route. Your immediate goal is to find the mission objective, but you also need to preserve a way back. In a random cave, the route that looks fastest on the way in may be awkward on the return, especially after a wall has been broken or a fight has moved the squad into a new space.
Use three questions whenever the team reaches a junction:
- Where is the next objective? Follow the current mission flow and investigate the available route rather than treating a familiar-looking room as the destination.
- Where can the squad fall back? Prefer spaces with a retreat option over a position that exposes the team to several openings at once.
- How will the team return to Extraction? Keep the broad direction of the entrance and the route already traveled in mind before pushing deeper.
Blue route-like guidance may appear useful for navigation, but the available information does not establish that it is a universal feature on every map or objective. Use any live marker or prompt that the game provides, while still checking the physical cave around the squad. Do not turn a recorded route or a single run’s direction into a fixed map rule.
Breaking walls without losing the route
Destructible terrain is one of the most important map decisions in Into the Hive. Breaking through a wall can open a path around a blocked corridor, give the squad a different angle on an encounter, or create space to disengage. It can also make the route harder to read and remove a useful piece of cover. A breach is valuable when it improves the next decision, not simply because it creates more open space.
Before breaking a wall, check the destination and the team’s position. If the opening leads toward the mission objective or gives the squad a safer fallback, it may be worth using. If the player opening the route will be isolated, or if the squad has no idea where the new passage reconnects, regroup first. The rest of the team should be ready to move through the opening rather than continuing to defend the old corridor as though the layout had not changed.
Walls can also affect defense. A narrow space may limit the number of directions that need attention, while a new opening can introduce another approach. Place a turret or use other equipment only after considering the new geometry. The combat guide covers the hold-versus-move decision once that geometry changes. The map evidence supports the use of weapons, tools, turrets, and grenades around destructible terrain, but it does not establish exact damage rules, wall durability, or which tools can break every wall. Follow the current interaction and equipment panels for those mutable details.
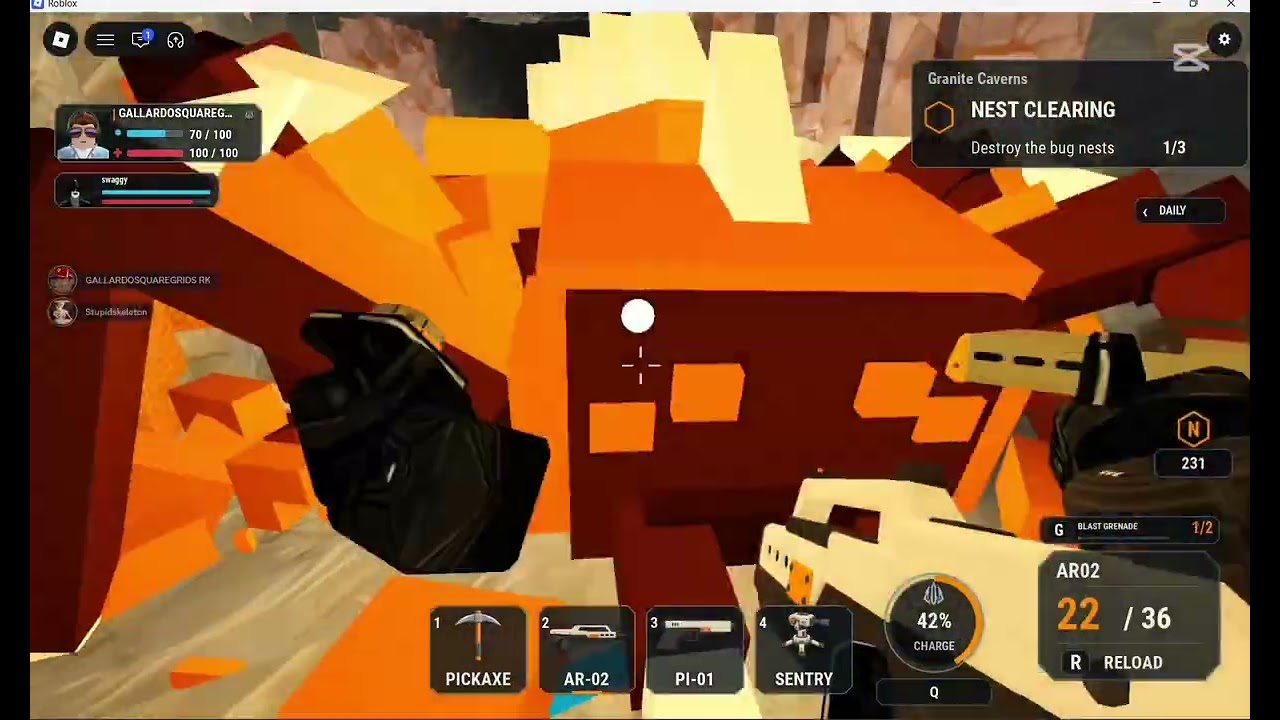
Breaking through walls while navigating Into the Hive caves
This moment supports the route-planning section by showing a wall being dug through while searching for a route, followed later by a call to complete the mission.
Handling encounters around map space
Enemy direction is a live positioning problem rather than a fixed map legend. Recorded encounters identify enemies approaching from the left, right, and middle, but those directions should not be read as permanent spawn points for every cave. When pressure changes sides, rotate the squad and keep enough room to retreat instead of staring down one corridor.
Responding to enemy approaches around the cave
These moments support the encounter-positioning section by identifying enemies approaching from the left and right, showing that threat directions can vary around the player.

A defensible position should do two things: give the team a clear line toward the current threat and leave a route for the next movement. If the swarm closes from one side, avoid backing into an unknown dead end. If enemies appear from multiple directions, reduce the exposed angles by moving toward better terrain or opening a route only when the breach produces a clear advantage. A turret can cover a threatened approach while the squad searches or relocates, but the map does not guarantee that one device will secure every entrance.
Treat an objective area as a decision point, not as proof that the run is already finished. Complete the mission objective shown by the current game flow, then confirm that the squad has entered the return phase. The available information does not list every objective type or explain every completion condition, so do not assume that reaching a room, defeating one group, or finding an apparent exit is enough unless the live mission state confirms it.
Planning the return to Extraction
Extraction is part of a successful map run, not an optional destination after the interesting section is over. The game description frames the expedition around exploring caves, completing the mission, and making the run back to Extraction. That makes the return route a planning constraint from the moment the squad enters.
Before committing to a deep push, keep a mental record of major turns, breaches, and fallback spaces. After the objective is complete, avoid unnecessary detours and fights if the route is open. Move as a group, because a player who knows the forward route may not be able to guide the team through a changed cave alone. If the squad changed the terrain, compare the return path with the route you intended to use before the breach.
The current map information does not confirm the Extraction point’s exact location, a failure timer, what happens when a teammate is down, or whether every run uses the same return rules. Use the live objective and Extraction indicators when available. If those indicators do not identify the route, search methodically from the last known objective area and preserve a defensible fallback rather than wandering into disconnected corridors.
What is not confirmed about the maps
Do not rely on an online list of named Into the Hive maps unless the game itself confirms it. The current reference does not establish specific map names, a rotation order, difficulty differences between maps, a complete mission-objective catalog, fixed enemy spawn rooms, reward differences by map, or a deterministic random-generation algorithm. It also does not confirm that every destructible wall behaves identically.
This limits what a trustworthy map guide can promise. It can explain how to read the cave, use a breach, respond to changing enemy directions, and protect the return route. It cannot provide a fixed turn-by-turn route for every expedition without inventing details that may not repeat. For mutable mechanics, use the current mission prompt, interaction prompt, equipment panel, and Extraction marker in your session.
The practical rule is simple: explore for the objective, shape terrain only when the new route helps, keep enemy approaches covered, and plan the way back before the mission is complete. Those habits remain useful even when the cave layout changes.
A quick map decision checklist
Use this short check whenever the squad is about to move deeper or alter the cave:
- Before advancing: identify the likely objective direction and leave enough space to turn back if the next room is unsafe.
- At a wall: inspect the opening’s destination, decide who covers the breach, and avoid sending one player ahead alone.
- During a fight: call the active approach direction and move the squad together when the current position loses its retreat route.
- After objective progress: confirm the mission state, then prioritize the route to Extraction over optional exploration.
- When lost: return to the last known objective area or recognizable junction and search from there instead of repeatedly choosing unknown branches.
This checklist does not replace a live marker or interaction prompt. It is a way to keep the important map relationships visible when the cave changes faster than the squad can memorize it. The safest route is the one that supports the next objective and still leaves a practical way out.
First-time Into the Hive map questions
Are there fixed named maps in Into the Hive?
No fixed list of named maps, map order, or permanent layouts is confirmed here. The supported map description is a set of sprawling, randomly generated caves, so use the current expedition’s routes and objective indicators rather than memorizing one layout.
Should I break every wall I find?
No. Break a wall when the opening improves access, creates a fallback, or gives the squad a better defensive route. Check where it leads and regroup before pushing through, because a breach can also make navigation and defense harder.
Do left, right, and middle indicate fixed enemy spawn points?
No. Those directions describe recorded approaches during encounters, not universal spawn locations for every cave. Turn toward the active threat and preserve a retreat route based on the space in your current run.
Does completing the mission automatically finish the expedition?
Not by itself. The supported flow includes completing the mission and then making the return trip to Extraction. Confirm the current return or Extraction state before treating the run as successful, because the exact objective and failure rules are not fully established.